Building a Secure File Uploader with Django, S3, and Vault
As an engineer, I often need to upload files—videos, audio, images, documents—and then embed or share them with anyone. Using AWS S3 as storage is powerful and cost-efficient, but logging into the AWS console every time I need to upload a file to a bucket is a hassle. That’s why I created this simple, secure web application to streamline the process.
This journey wasn’t just about uploading a file; it was about building a tool the right way. We’ll go beyond a basic script and build a production-ready application that handles security, large files, and a robust database backend.
Let’s walk through how we built it, step by step.
The Goal: A Secure, Web-Based S3 Uploader
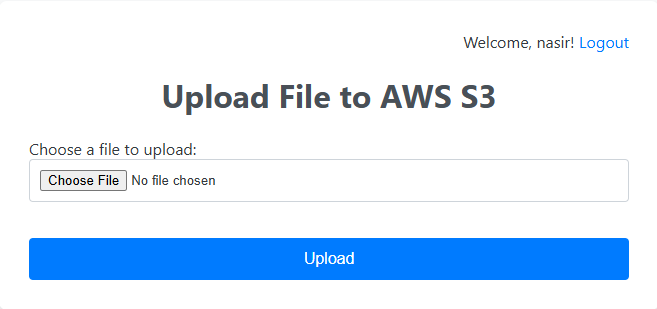
Our goal is simple: create a web page where an authenticated user can select a file, upload it directly to an S3 bucket, and immediately get a public URL for sharing.
To achieve this, we’ll use a powerful and reliable tech stack:
- Backend: Django
- File Storage: AWS S3
- Database: PostgreSQL
- Secrets Management: HashiCorp Vault
- Reverse Proxy: Nginx
Part 1: The Basic Django App and S3 Connection
First, we started with a standard Django project. The core of connecting Django to S3 lies in two packages: boto3 (the AWS SDK for Python) and django-storages.
pip install django boto3 django-storagesThe initial step was to configure settings.py to use S3 as the default location for media files.
# s3project/settings.py

# This tells Django where to store uploaded files
DEFAULT_FILE_STORAGE = 'storages.backends.s3boto3.S3Boto3Storage'

# These are the credentials and bucket details
AWS_ACCESS_KEY_ID = 'YOUR_AWS_ACCESS_KEY_ID'
AWS_SECRET_ACCESS_KEY = 'YOUR_AWS_SECRET_ACCESS_KEY'
AWS_STORAGE_BUCKET_NAME = 'your-bucket-name'
AWS_S3_REGION_NAME = 'your-region'

# Make uploaded files public by default
AWS_DEFAULT_ACL = 'public-read'
AWS_QUERYSTRING_AUTH = False # Remove query params from the URL

MEDIA_URL = f'https://{AWS_STORAGE_BUCKET_NAME}.s3.amazonaws.com/'
MEDIA_ROOT = '' # We'll upload to the root of the bucket
Of course, hardcoding secrets like this is a terrible practice. That brings us to the most important part of our setup: security.
Part 2: Securing Credentials with HashiCorp Vault
Instead of leaving our AWS keys in settings.py, we leveraged HashiCorp Vault, a tool built specifically for managing secrets.
First, we stored our AWS keys and, later, our database credentials in Vault using its command-line interface.
# Store AWS secrets
vault kv put secret/aws/nasir \
    AWS_ACCESS_KEY_ID="..." \
    AWS_SECRET_ACCESS_KEY="..."

# Store Database secrets
vault kv put secret/django/postgres \
    DB_NAME="..." \
    DB_USER="..." \
    DB_PASSWORD="..."
Next, we updated settings.py to fetch these secrets at runtime using the hvac library. This ensures our sensitive credentials never touch the codebase.
# s3project/settings.py
import hvac
import os

VAULT_ADDR = os.environ.get('VAULT_ADDR')
VAULT_TOKEN = os.environ.get('VAULT_TOKEN')

aws_secrets = {}
db_secrets = {}

if VAULT_TOKEN:
    client = hvac.Client(url=VAULT_ADDR, token=VAULT_TOKEN)
    if client.is_authenticated():
        # Fetch AWS secrets
        aws_response = client.secrets.kv.v2.read_secret_version(...)
        aws_secrets = aws_response['data']['data']

        # Fetch Database secrets
        db_response = client.secrets.kv.v2.read_secret_version(...)
        db_secrets = db_response['data']['data']

# Now, use the fetched secrets
AWS_ACCESS_KEY_ID = aws_secrets.get('AWS_ACCESS_KEY_ID')
DATABASE_NAME = db_secrets.get('DB_NAME')
# ...and so on
Part 3: The Uploader App and Authentication
With our settings secured, we built a simple Django app named uploader.
models.py: We created anUploadedFilemodel with aFileField. We setupload_to=''to ensure files go to the root of our bucket.forms.py: A standardModelFormfor ourUploadedFilemodel.views.py: The core view logic. We used the@login_requireddecorator to protect the view, ensuring only logged-in users could access the uploader.
# uploader/views.py
from django.contrib.auth.decorators import login_required

@login_required
def upload_file_view(request):
    if request.method == 'POST':
        form = FileUploadForm(request.POST, request.FILES)
        if form.is_valid():
            uploaded_file_instance = form.save()
            # ... render success page
    # ...
To support the login system, we added Django’s built-in LoginView and LogoutView to our main urls.py and configured the redirect settings in settings.py.
Part 4: Switching to a Production Database
The default SQLite database is great for development, but for a real application, we need something more robust. We switched to PostgreSQL.
This involved:
- Installing the database driver:
pip install psycopg2-binary. - Creating a new database and user in PostgreSQL.
- Granting the correct permissions to our new user so it could create tables. This was a crucial step that often trips people up.
- Updating the
DATABASESdictionary insettings.pyto use the credentials fetched from Vault. - Running
python manage.py migrateto build the schema in our new PostgreSQL database. - Running
python manage.py createsuperuserto create an admin account for the new database.
Part 5: Going Live with Nginx
When deploying the app to a live server at upload.nasir.id, we hit the final set of classic production hurdles.
CSRF “Origin Checking Failed”
Django’s CSRF protection rightly blocked POST requests from our new domain. The fix was to explicitly tell Django which domains to trust.
# settings.py
ALLOWED_HOSTS = ['upload.nasir.id']
CSRF_TRUSTED_ORIGINS = ['https://upload.nasir.id']
Handling Large Files
By default, both Django and Nginx have small limits on file upload sizes. We increased these to handle files up to 100 MB.
# settings.py
DATA_UPLOAD_MAX_MEMORY_SIZE = 104857600 # 100 MB
```nginx
# /etc/nginx/sites-available/your-site
server {
    # ...
    client_max_body_size 100M; # This is crucial
    # ...
}
Conclusion
This project evolved from a simple idea into a robust, secure, and production-ready application. We didn’t just upload a file; we learned how to manage secrets professionally with Vault, configure a production-grade database, and correctly deploy a Django app behind a reverse proxy.
By solving problems step-by-step—from permissions errors to CSRF failures—we built a tool that is genuinely useful and follows best practices. The full code is available for reference on GitHub https://github.com/nasir19noor/nasir.id/tree/main/apps/upload-nasir-id
Also published in medium https://nasir19noor.medium.com/building-a-secure-file-uploader-with-django-s3-and-vault-acdc52025b9e